REVIEW · LUCERNE
Best of Lucerne Walking Photography Tour
Book on Viator →Operated by Passenger Diaries Switzerland Tours & Experiences · Bookable on Viator
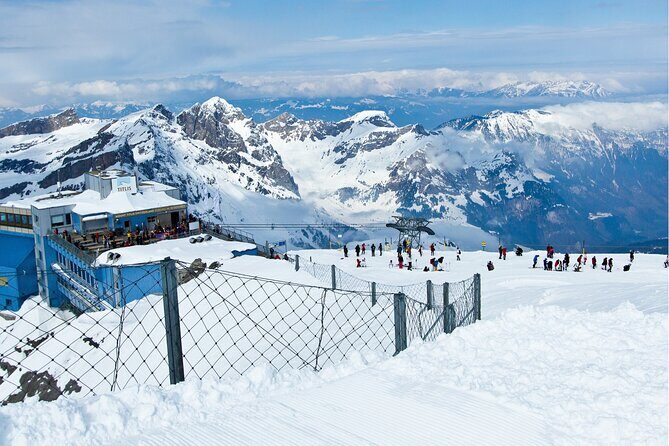
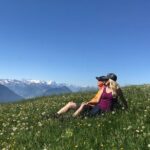
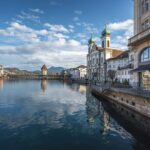
Lucerne turns into a camera classroom fast. This 2-hour walking photo tour in central Lucerne helps you frame the classics and the details, from the medieval Chapel Bridge to the lake and alpine backdrops. You’re not just sightseeing—you’re learning how to see like a photographer as you move through the city.
I love the small group of up to 8, because the guide can actually coach you instead of talking at you. I also like that you can show up with a compact camera, a DSLR, or just a smart phone—and still leave with better shots and practical ways to improve.
One possible drawback: you’ll do some uphill walking for the best viewpoints, so plan for moderate fitness and wear proper shoes.
In This Review
- Quick takeaways before you book
- A 3:00 pm Lucerne photo walk that actually teaches you how to shoot
- Why the small group (8 people max) matters for your photos
- Meeting at Torbogen Luzern Bahnhofpl and what to bring
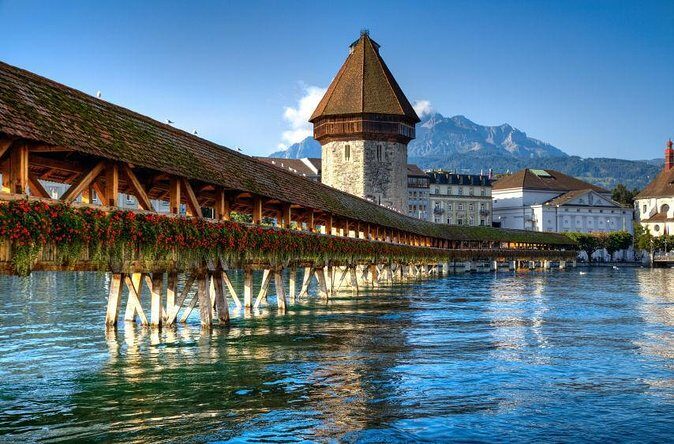
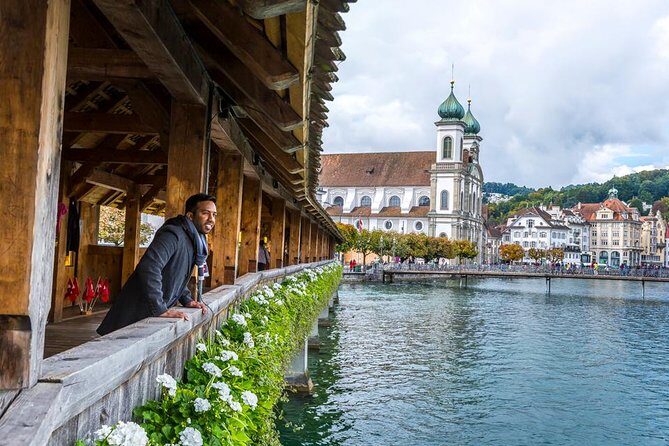
- Stop 1: Chapel Bridge—how to photograph a postcard without looking generic
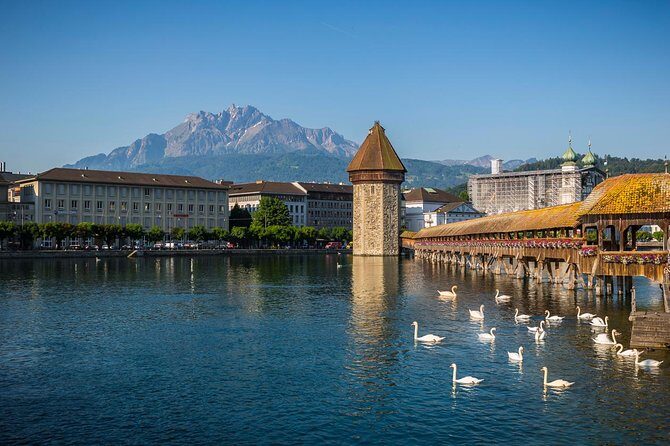
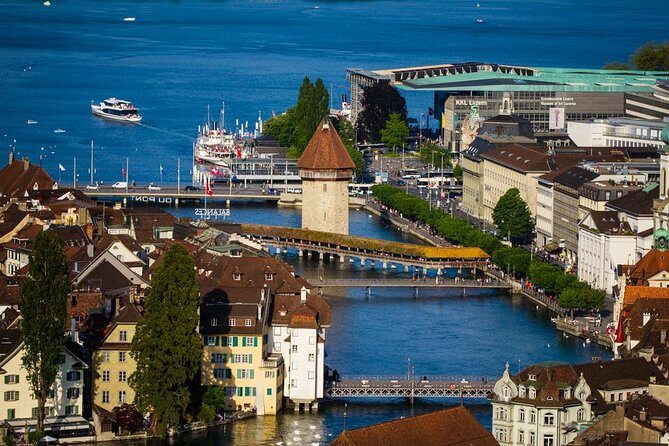
- Stop 2: Lake Lucerne and Swiss Alps—work with reflections and depth
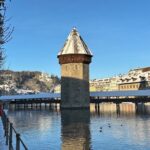
- Stop 3: The city wall and its original medieval towers
- Stop 4: The city castle and panorama view—get the shot, then refine it
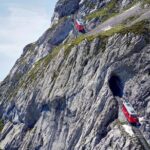
- Stop 5: Walking uphill along the ancient wall for alpine panoramas
- Stop 6: Fortification area—three towers in summer, nine towers in winter
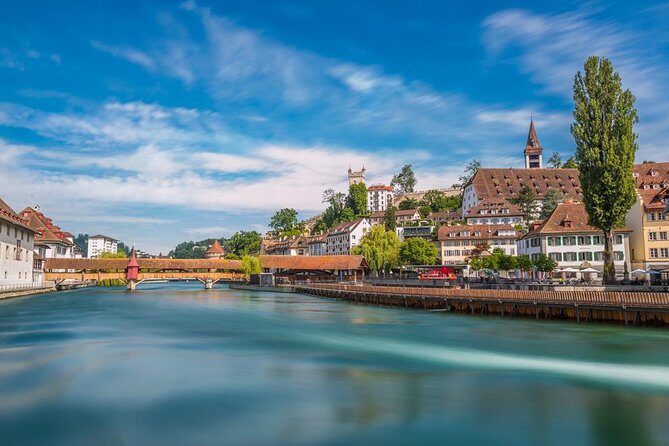
- Stop 7: The Chaff bridge—hunt for design details, not just the bridge
- Stop 8: The most important Swiss monument—finish with meaning and strong framing
- Photography tips you’ll actually use, whether you shoot DSLR or phone
- Price and value: is $212.65 worth it?
- Logistics that matter in real life (and a few easy fixes)
- Who should book this Lucerne walking photography tour?
- Should you book? My straight answer
- FAQ
- What is the duration of the Best of Lucerne Walking Photography Tour?
- How many people are in the group?
- What time does the tour start, and where do we meet?
- Is the tour offered in English, and do I need a certain camera?
- Is food or drinks included?
- Is hotel pickup included?
- Can I cancel for free?
Quick takeaways before you book
- Up to 8 people means more hands-on guidance at the exact spots you want to photograph
- Pro photographer guide (Luis) focuses on real framing, not theory
- Smart phone friendly along with compact and DSLR cameras
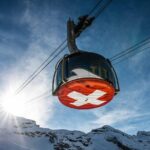
- Iconic Lucerne hits (Chapel Bridge, lake/alpine views, city walls, castle views)
- Seasonal variation: tower-walk style changes between summer and winter
- No food included, so you may want a snack plan if you’re out at 3:00 pm
A 3:00 pm Lucerne photo walk that actually teaches you how to shoot
The best part of this tour is how quickly it turns your camera into a tool for seeing. You’ll start in the Bahnhof area and then work your way through the most photogenic corners of Lucerne, but the emphasis stays on how to capture what you’re looking at. That matters, because anyone can point and shoot. Not everyone knows how to make the image feel intentional.
Starting at 3:00 pm is handy for the city’s visual rhythm: you get enough daylight for details, reflections, and textures, and you’re not competing with the very early-day crowd energy. It’s also a good length. Two hours sounds short, but when you’re guided from stop to stop, it feels like a focused mini workshop.
You should expect a walking pace that includes viewpoints and some elevation. If you’re comfortable with a moderate uphill stretch, you’ll be fine. If you usually avoid stairs and hills, you might find the route more tiring than you want.
You can also read our reviews of more walking tours in Lucerne


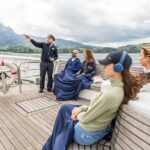
Why the small group (8 people max) matters for your photos
In a group of this size, the guide can slow down for real-world issues. That shows up in the feedback: one guest came with a Nikon D7200 and appreciated how patient Luis was when they changed lenses and tried again to get it right. That’s the difference between a generic walking tour and an actual photo coaching session.
With only 8 people, you’re also more likely to get feedback tailored to your camera and your goal. You might want a crisp shot of the Chapel Bridge, or you might focus on water reflections and mountain silhouettes. Either way, you’ll get suggestions that match what you’re trying to capture.
And because it’s small, you can ask questions without feeling rushed. If you’re the one person in your group who always brings the camera, you’ll still get your own shots too—Luis even took a photo of one guest who usually photographed everyone else.
Meeting at Torbogen Luzern Bahnhofpl and what to bring
You meet at Torbogen LuzernBahnhofpl., 6003 Luzern. The good news is that it’s near public transportation, so you’re not forced into a complicated transit plan.
Bring:
- Your camera or phone (compact, pro camera, or smart phone all work)
- Comfortable shoes for uphill sections
- Something to wipe your lens if you have one (Lucerne air can be a mix of lake humidity and city dust)
- A charged battery and free storage space
Also, set a realistic expectation: this is English offered, and it’s a guided photo walk, not a private tour where the stops become fully customized. The coach can help you, but you’re still moving along a set route.
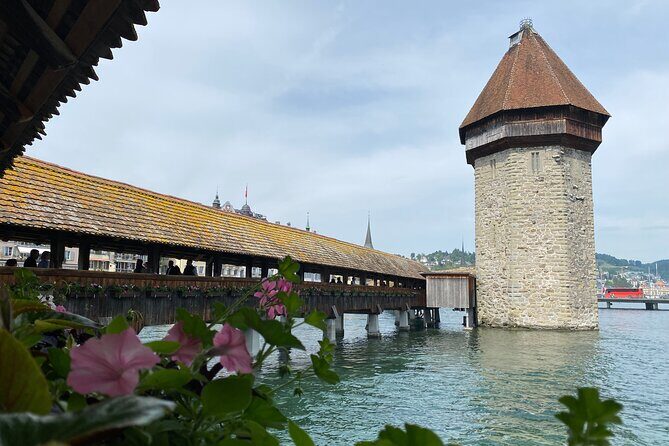
Stop 1: Chapel Bridge—how to photograph a postcard without looking generic
You’ll begin by photographing and learning about the Chapel Bridge. This is where the tour finds its footing fast. Chapel Bridge is a classic Lucerne subject, so the temptation is to take the obvious shot from the first good angle. The guide pushes you to slow down and frame it with intent.
What I like about this stop is that you’re learning the subject while you shoot it. You’re not just collecting pictures—you’re building context. That context often changes your composition choices: you start looking for how the bridge lines lead your eye, how the structure sits against the water or sky, and where to place the frame so the image feels balanced.
In a small group, you can also take a few shots from slightly different positions without feeling like you’re holding everyone up. If you’re using a bigger camera, this is usually a comfortable start: you’re taking time before the route gets steeper.
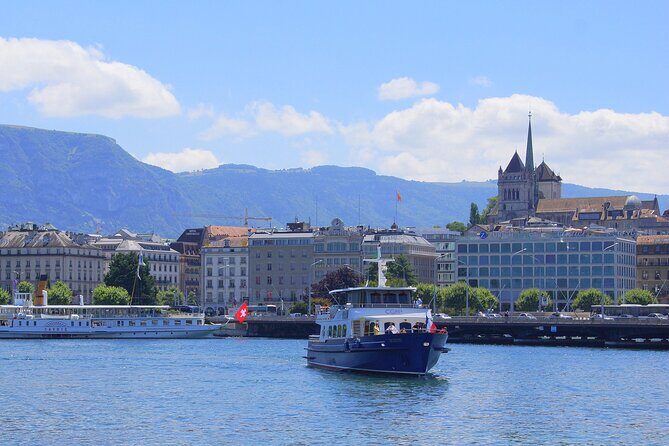
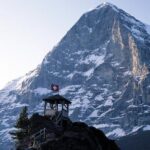
Stop 2: Lake Lucerne and Swiss Alps—work with reflections and depth
Next comes Lake Lucerne and the Swiss Alps. Lake views can be tricky because you’re dealing with two things at once: the scenery and the reflections. The guide’s job here is to help you decide what to prioritize—clarity in the foreground, sky balance, or that layered look where mountains sit behind the water.
This is a great moment to experiment. Try different framings: tighter crop vs wider context. Move a step or two and watch how the background changes. Even a small shift can change the “story” your photo tells.
If you’re shooting with a phone, you’ll still get useful coaching. The idea isn’t to chase DSLR-only settings—it’s to learn how to position yourself and how to see the light and the water as part of your composition.

Stop 3: The city wall and its original medieval towers
Then you move to Lucerne’s city wall area with nine original medieval towers. Walls are a photographer’s friend. They give you repeating shapes, strong vertical lines, and a natural structure for composing depth. You can build a photo by using the towers like markers that pull your eye through the frame.
What makes this stop feel rewarding is that it’s not just a background. You’re actively photographing the wall and towers as a designed fortification system. That’s where the history element helps you avoid the “random wall shot” problem.
A practical tip: when you photograph tall, narrow structures, pay attention to your edges. Walk a little left or right and keep the towers cleanly separated in your frame. In a guided group, you can take a quick moment to adjust before the crowd energy moves you along.
Stop 4: The city castle and panorama view—get the shot, then refine it
After the wall stops, you’ll visit the city castle area for a panorama that includes city, lake, and mountains. This is one of those viewpoints where it’s easy to freeze and just point. But the tour approach helps you keep control.
You’ll get time to capture the overview shot, and then you can refine it. Refinement might mean changing your angle slightly to reduce clutter, or shifting your framing so the lake acts like a visual leading line instead of just a bright patch behind buildings.
Because this stop includes a better perspective of the city layout, it’s especially useful if you want a photo that explains Lucerne to someone who’s never been. The castle viewpoint gives you that “from above” logic.
Stop 5: Walking uphill along the ancient wall for alpine panoramas
Next comes a route along the ancient wall of Lucerne, and yes, you walk uphill. That uphill effort is the trade-off, but it’s also what makes the images better. From a higher angle, the city spreads out and the mountains feel more present.
This is also where your shoes matter. If your feet feel good, you can keep moving slowly enough to find the best framing. If you’re uncomfortable, you’ll rush and miss the details.
Keep an eye on your horizon line too. Panoramas tempt people to tilt their phone or camera too much. A guided pause at the right spot helps you avoid that common mistake and makes it easier to get a clean, level-feeling image.
Stop 6: Fortification area—three towers in summer, nine towers in winter
You’ll then explore the fortification area. The tour notes a seasonal difference: in summer, you walk on the wall along three towers, while in winter you walk along the wall to admire the nine towers and the wall.
That’s a big deal for planning your expectations. In summer you get a shorter tower sequence, so your challenge becomes making each frame count. In winter, the path and viewing style shift, which can change lighting and the pacing of your photos.
Either way, this stop is about pattern and structure. Towers repeat, walls guide, and the city’s geometry becomes part of the picture. If you like architectural photography, you’ll enjoy this section more than the standard sightseeing stops.
Stop 7: The Chaff bridge—hunt for design details, not just the bridge
After the towers and walls, you’ll learn about and photograph the Chaff bridge. Bridge photography is often treated as a single subject: you either shoot it or you skip it. Here, you’re encouraged to look for design elements.
This is one of those moments where your guide’s photography mindset pays off. The best bridge shots usually include something more than the main structure: symmetry, repeating patterns, a good angle, or a composition that uses the surrounding space.
If the lake reflections are visible where you stand, you might find you can create a more layered photo. If the light is flatter, you can still create drama through line and structure.
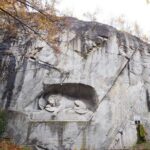
Stop 8: The most important Swiss monument—finish with meaning and strong framing
The final major stop is discovering the most important Swiss monument. Even without naming it here, monuments often give you a different photo challenge. They demand respect in framing, and they can also tell a fuller story than buildings and bridges alone.
For your camera, this is a good chance to slow down and make your closing shots feel composed rather than rushed. If you’ve spent the first part chasing towers and views, this ending stop shifts the focus toward intention.
If you’re trying to create a mini-photo essay of Lucerne—city overview, architecture, water, then a symbol—this last stop helps the sequence land.
Photography tips you’ll actually use, whether you shoot DSLR or phone
This tour is built around photography tips and tricks, and the best part is that the advice seems practical. The feedback specifically points to Luis being skilled and patient, especially with lens changes and getting shots right. That tells me the teaching style isn’t just lecture-based.
So what should you expect the coaching to do for you?
- Help you choose the best angle instead of the first available one
- Remind you to check framing and keep edges clean
- Give you ways to approach different subjects—bridges, water views, towers, and panoramas
- Make space for questions as you shoot
If you’re using a phone, don’t worry. Phones are already strong for Lucerne’s daylight scenes. Your biggest wins usually come from position and composition, not from advanced settings.
Price and value: is $212.65 worth it?
At $212.65 per person for about two hours, you’re paying for more than a walk. You’re paying for a professional photographer guide plus the small-group limit (max 8). That combination is the value driver.
If you’re the type who loves taking photos but never feels like they come out as planned, this price can make sense fast. The tour compresses practice time into a guided route where you get feedback right when you need it.
You’re also not paying for transport, food, or hotel pickup here. That’s a normal setup for a walking tour. Just plan to arrive ready to go, and decide if you want a post-walk meal so your day doesn’t feel chopped in half.
Compared with self-guided walking plus random photo tips online, the biggest difference is real-time coaching at real locations. That’s hard to replace on your own.
Logistics that matter in real life (and a few easy fixes)
This activity uses a mobile ticket, and confirmation arrives at booking. It starts and ends at the same meeting point, so you’re not dealing with a complicated end-of-day transit puzzle.
All camera skills are welcome, including compact/pro cameras and smart phones. That’s important because it means you’re not locked out if you don’t carry heavy gear.
One more practical point: you’ll be walking, including uphill parts. Moderate fitness is enough, but go in with a realistic plan: water, comfortable shoes, and a camera strap or safe phone grip so you can move and shoot without panic.
Who should book this Lucerne walking photography tour?
This tour is ideal if you:
- Want better photos of Lucerne’s top icons without guessing
- Enjoy architectural details like walls, towers, and bridges
- Prefer a guided experience where you can ask questions
- Want coaching that works for both phones and cameras
It may be less ideal if you:
- Hate uphill walking and steep, view-based routes
- Need a fully relaxed, slow sightseeing pace
- Are looking for a long day tour with lots of breaks and food included
Should you book? My straight answer
If you want Lucerne photos that look intentional—not just familiar postcard angles—this is a strong choice. The combination of a pro photographer guide (Luis), a small group size, and hands-on tips at the exact spots you care about makes it feel efficient.
I’d book it if photography is part of your trip vibe and you’re comfortable with moderate walking. I’d skip it if you mainly want a casual stroll and you’re not interested in learning how to frame what you see.
FAQ
What is the duration of the Best of Lucerne Walking Photography Tour?
It runs for about 2 hours.
How many people are in the group?
The tour has a maximum of 8 travelers.
What time does the tour start, and where do we meet?
It starts at 3:00 pm at Torbogen LuzernBahnhofpl., 6003 Luzern, Switzerland, and it ends back at the same meeting point.
Is the tour offered in English, and do I need a certain camera?
It’s offered in English, and all camera skills are welcome. A compact, professional camera, or a smart phone are all fine.
Is food or drinks included?
No. Food and drinks are not included.
Is hotel pickup included?
No. Hotel pickup and drop-off are not included.
Can I cancel for free?
Yes, you can cancel for a full refund up to 24 hours before the experience starts.